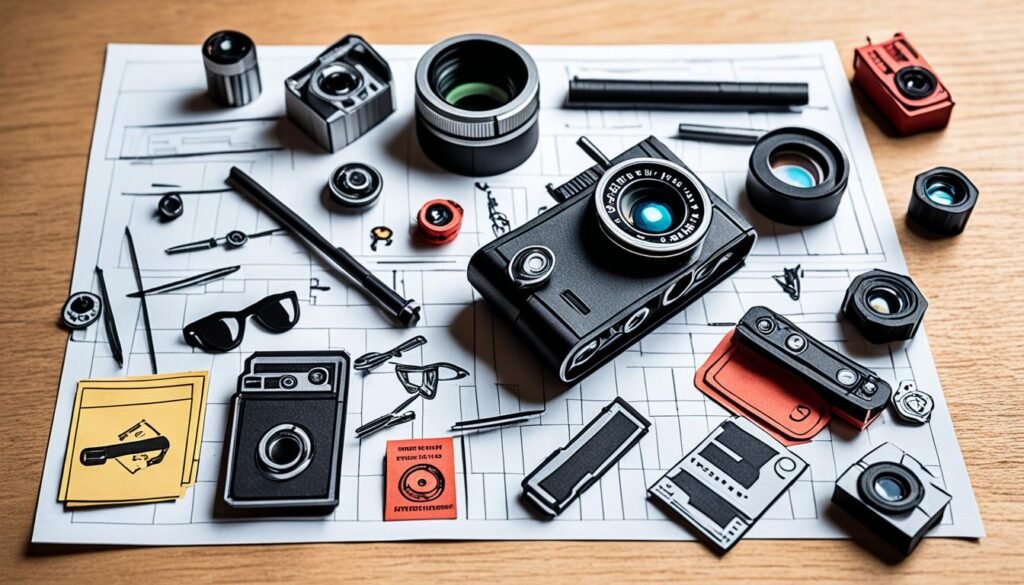
Ever thought about making paper craft spy gear for fun secret missions?
By making your own spy gadgets and disguise kits, you enter a thrilling spy world. This way is cheap, fun, and educational. It helps kids express their creativity and smartly solve make-believe mysteries.
Making cool stuff like a DIY Spy Decoder or a Keyhole Spy Gadget is pretty easy. You just need some black paper, a marble, and ready to go. It’s a fun way to spend time.
For example, you can make Invisible Ink with lemon juice or a Spy Periscope with mirrors. Try creating a spy ID card for more role-playing fun. Also, you can customize your spy look with earpieces and binoculars. The fun’s not just in the making but in using what you’ve created.
Starting is easy and fun for kids. They’ll love playing spy with a kit that has sunglasses, a mustache, a flashlight, and invisible ink. It’s all about having a blast in a world of spies you’ve made yourself.
Introduction to DIY Spy Gear for Kids
Step into the captivating realm of DIY spy gear for kids! Creating your own spy gadgets is not only fun but educational too. It helps kids think in new ways and problem-solve with creativity.
One big plus of these crafty spy tools is you can make them just how you like. For example, a paper case doesn’t have to be plain. With a bit of decoration, it can hold all your special gear. Kids can use stencils to put cool names on their spy stuff.
Working on these projects also helps with motor skills and concentration. Making a secret notebook is a great activity. Decorate each page with small items like charms and stickers. It turns into a fun spot for keeping secrets.
DIY spy gear uses simple materials you can find at home or in stores. With felt and clear plastic, you can make an I-spy bag. Fill it with fun items like beads and game pieces. This project was a hit at the SINGER Kids Crafts Contest.
DIY activities like invisible ink messages mix fun with science learning. Making simple “explosions” teaches real scientific ideas. Kids between 8-10 learn to solve problems and be more independent this way.
For book lovers, stories like “The Unbreakable Code” offer exciting mysteries. They also help in learning how to think through puzzles and codes. This improves critical thinking skills.
Tying spy gear to arts and crafts boosts creativity and critical thinking together. Children get a chance to play while learning important life lessons. It’s a win-win for parents and kids.
These projects are perfect for children interested in spy adventures. They offer a fun way to explore the world of espionage.
Spy Teddy: Transforming Stuffed Toys into Gadgets
Ready for a fun project that turns a teddy bear into a spying gadget? A spy teddy makes playtime more exciting. He’s not just any teddy, he’s a secret agent teddy.
Materials Needed for Spy Teddy
- An old teddy bear with dark eyes
- Small electronics toolset
- Webcam (preferably small)
- Common household items (scissors, needle, and thread)
Step-by-Step Instructions to Create a Spy Teddy
- Prepare the Teddy: Gently open the teddy’s back to get to its inside.
- Install the Webcam: Put the webcam in the teddy’s head, making sure the lens lines up with its eye.
- Secure the Electronics: Connect the webcam properly, then hide any wires or parts.
- Re-sew the Teddy: After placing the webcam securely, sew the teddy’s back up again.
- Testing: Try the webcam, making sure it works and gives a clear view.
Tips for Making a Successful Spy Teddy
- Choose the Right Teddy: Pick a teddy with big, dark eyes for good hiding of the camera.
- Maintain Discreet Appearance: Close the seam cleanly so no one notices the change.
- Secure Connections: Check all your connections to avoid any problems with the camera.
| DIY Spy Gadget | Materials Needed | Key Features |
|---|---|---|
| Spy Teddy | Teddy, webcam, electronics toolset | Concealment, webcam surveillance |
| Fingerprint Set | Black paper squares, ink | Fingerprint analysis |
| Invisible Ink Kit | Lemon juice, cotton buds, heat | Hidden messages |
Follow these steps and hints to make your spy teddy cool and functional. Let’s step into the world of crafting spy gadgets. Imagine epic spy adventures with your new toy.
Making a DIY Fingerprint Set
Every wannabe spy dreams of being an expert at fingerprint analysis. A DIY fingerprint kit is a must-have in making your own spy collection. It not only sharpens your skills but also makes learning fun as you get to explore different prints.
Start by collecting some easy-to-find materials. You can craft a simple set using things from around the house, like flour or baby powder. Here’s what you need to begin:
| Item | Description |
|---|---|
| Flour or Baby Powder | Used as the fingerprint dusting powder. |
| Scotch Tape | Helps to lift the fingerprint from the surface. |
| Ink Pad | For capturing known fingerprints to compare with unknown prints. |
| White Paper | To transfer and preserve your lifted prints. |
After getting your stuff together, it’s time to dive in with these easy steps:
- Get someone to leave a fingerprint on a surface you choose.
- Sprinkle some flour or baby powder over the print.
- Brush off the extra powder gently to see the print clearly.
- Put a piece of scotch tape on the print to lift it from the surface.
- Stick the tape to a white paper to neatly transfer the print.
This DIY project offers an exciting way to explore the basics of forensic science. It mixes paper craft spy gear with fun, boosting both your creativity and investigation skills. So, get your kit ready, unleash your inner detective, and start enjoying the hunt for fingerprints!
How to Create a Book Safe for Hidden Treasures
Creating a book safe is a smart idea for young spies to hide their secrets. It not only provides great spy gear but is also a fun, educational project. It encourages creativity. Here’s a guide on what you’ll need and how to make and use your book safe.
Materials Needed for a Book Safe
- A thick, unwanted hardcover book
- A craft knife
- Ruler and pencil
- Glue or wallpaper paste (optional)
- Scissors
- Brush for applying glue
Step-by-Step Guide to Crafting Your Book Safe
- Choose a thick book that you don’t need anymore. A thicker book means a larger hiding space.
- Open it and mark a rectangle on the first page using a ruler and pencil. Leave a margin of about an inch on all sides.
- Cut through along the markings with a craft knife, taking out a few pages at a time. Do this until your hiding compartment is deep enough.
- If you want, use glue or wallpaper paste to stick the cut pages together. This will make the remaining pages stiff.
- Leave the book to dry completely before you put anything in its secret compartment.
- For more secrecy, keep your book safe between other books on your shelf.
Additional Tips for Crafting and Using Your Book Safe
- Choose a discreet title: Pick a book with a title that doesn’t stand out to keep your treasures safe.
- Ensure camouflage: Use other normal books around the book safe to keep it hidden and avoid accidents.
- Secure with wallpaper paste: For a professional finish, use wallpaper paste to make the pages stay together better.
- External disguise: Keep the book clean from dust so it looks like any other book.
Building a book safe is a fun way for kids to make their spy gear. It teaches them to solve problems and offers a great place to hide valuables in plain view. Let your imagination run wild as you customize this project for your secret stash!
Assembling Your Own DIY Spy Kit in a Box
Making your own DIY spy kit is a great way to have fun. It’s like playing a game where you create your tools. This is a cool project for kids who want to be secret agents. We’ll show you how to make a spy box that is cool and useful.
Items to Include in Your Spy Kit
When you build your DIY spy kit, think about what you need. Here’s a good starting list:
- Spy sunglasses
- Fake moustache
- Binoculars
- Flashlight
- Notebook and pencil
- Spy ID card
- Fingerprint set
- Invisible ink
Look around or visit a craft store to find these tools at a low cost.
Customizing Your Spy Box with Paint and Labels
The look of your spy box is key. Start by painting it with a cool color. Then, use stickers and labels to know what goes where.
- Paint the box all in one color, like black, for a sneaky look.
- Label each part of the box with markers or printed tags.
- Add things like warning signs to make your kit look real.
This step makes your spy kit not just good-looking but also organized. You’ll find your spy tools easily when playing detective.
Ideas for Additional Spy Gadgets and Tools
Want more spy gear? Here are some cool ideas to add to your kit:
- Make-up or a false moustache for a cool disguise.
- A spy earpiece that works with a walkie-talkie.
- Small magnifying glass
- Evidence bags for collecting clues
- DIY spy decoder made from poster board
- Cotton buds and a notepad for secret ink messages
Adding these tools makes your spy gear better. Now you’re set for missions and solving mysteries!
Designing a DIY Secret Agent Costume

Creating a DIY secret agent costume is fun and brings a lot of joy. Kids can use things lying around the house to look like real spies. This detailed guide will help you make your own cool costume.
First, let’s talk about the hat. You will need black and white poster boards, which are around $1.00 each. Use the black board for the hat’s base and the white one for some details. Then, cut out the hat’s brim in a circle that fits the head and a rectangle for the main part. Add a smaller cut at the top to shape it.
Glue the hat’s parts together. Then, cut 1-inch white paper strips to go around its edge. This table sums up the materials:
| Component | Material | Dimensions | Cost |
|---|---|---|---|
| Hat Brim | Black Poster Board | Fits Head Size | $1.00 |
| Hat Body | Black Poster Board | 10″ Wide, 4″ Beyond Head Circumference | $1.00 |
| Detail Trims | White Poster Board | 1″ Wide Rectangles | $1.00 |
To finish your spy look, wear a white shirt, black hoodie, and shorts. Make-up or a fake mustache can make you look more like a detective. You can also make an ID card at home. Don’t forget to bring a magnifying glass, a notepad, and a pencil for your spy kit.
Join events like the Wear It! Contest or Halloween party. These are great places to show off your cool spy costume and crafts.
How to Build a DIY Spy Periscope
Get ready to upgrade your spying skills with a DIY spy periscope. You can make this gadget at home with simple items. It lets you peek around corners and over barriers. Read on for the step-by-step guide and the things you’ll need.
Materials Needed for a Spy Periscope
- Long narrow cardboard box
- 2 mirrors (2” x 2”, or 5cm x 5cm)
- Duct tape
- Knife
- Marker
Detailed Steps to Create Your Own Periscope
- Prepare the Body: Start by sealing both ends of a long, narrow cardboard box with tape to make it sturdy.
- Cut Holes for Mirrors: Then, mark and cut two 2-inch square holes about 1/3 inch from each end with a knife.
- Create Slots for Mirrors: Next, cut 45-degree angled slots next to these holes for the mirrors to fit in.
- Insert Mirrors: Put the mirrors in place, angling them correctly so you can see clearly.
- Secure Mirrors: Finally, wrap duct tape around the mirrors to keep them safe and steady.
- Test the Periscope: Look through one end. Make sure the mirrors are lined up right to see something interesting.
Decorating and Camouflaging Your Spy Periscope
To make your periscope look like it belongs, you can paint it or wrap it in colored tape. Adding stickers is another fun idea. Match the colors and patterns to where you’ll be using it. This makes your periscope great for spying without being seen.
Creating your own spy gadgets, like this DIY spy periscope, is cool and creative. It’s perfect for secret missions. So, grab your supplies and start crafting a fun and useful tool.
Crafting a Home-made Invisible Ink Kit
Get your young spies excited with a homemade invisible ink kit. It mixes the fun of espionage with simple items from home. It’s great for kids wanting to dive into the world of paper craft spy gear. Here’s an easy guide to kick things off.
You’ll use two kinds of invisible ink, acidic and sympathetic inks. This mix of education and fun goes way back, used by spies and governments. Chemicals used for invisible ink became more complex during WWII. This made this spy tool even more interesting.
For your spy gear for kids, lemon juice will be your ink. It’s easy, safe, and fun, needing just a few steps and kitchen stuff. It’s a hands-on way to pass secret messages. Here’s what to do:
- Step 1: Squeeze lemon juice into a small bowl.
- Step 2: Use a cotton swab or a fine-tipped brush to write a message on a piece of white paper.
- Step 3: Let the paper dry for 15 minutes.
- Step 4: To see your message, hold it close to a heat source like a light bulb. Your message will appear in about 20 minutes, thanks to the lemon juice browning.
There’s also a method with water and baking soda, needing a bit more but still easy. The secret messages are written with the baking soda solution. To see them, use rubbing alcohol and turmeric.
Now, let’s compare the two methods:
| Method | Supplies | Revealing Technique | Time to Reveal |
|---|---|---|---|
| Lemon Juice | Juice from one lemon, cotton swab, paper | Heat source | 20 minutes |
| Baking Soda | Water, baking soda, rubbing alcohol, turmeric | Reagent solution | Approximately 15 minutes |
The lemon juice makes messages look like burnt marks. Baking soda messages give off a soft, hidden touch before being revealed. Both methods create secret ways to communicate. They’re perfect to add to your paper craft spy gear collection. Let your young detectives have fun and practice secret messaging with these cool methods!
Creating a Professional Spy ID Card
Making a spy ID card is a big part of your spy look. It makes you seem more real and lets you have fun designing something cool. Whether it’s for a game or a project, these steps will help you make a great spy ID.
Essential Materials for a Spy ID Card
To tackle this project, you’ll need:
- Cardstock or thick paper
- Scissors
- Markers or colored pencils
- Stickers for added details
- Cord or lanyard (optional)
- Plastic sleeve (optional for durability)
Design and Assembly Instructions for Your ID Card
First, cut your paper into a rectangular shape. It should be the size of a standard ID card. Use the markers or pencils to add your spy name, title, and details. Think about adding a barcode, cool symbols, or a secret name to make it look real.
- Plan your design on a template first to make it neat.
- Put on stickers to make your badges look special.
- For safety, use a plastic sleeve to protect your card.
Tips to Enhance and Personalize Your Spy ID
For a stand-out and strong spy ID, do the following:
- Personalization: Choose a fun code name and spy title.
- Durability: Cover your card with plastic or keep it in a sleeve.
- Details: Add a small photo to make it real.
- Accessorize: A lanyard helps keep your card handy.
This craft is all about being creative and having fun. These guidelines and ideas will make your spy ID look perfect for any secret mission.
| Detective Gear Usage | Percentage |
|---|---|
| Bag with Pockets | 71% |
| Using Notebooks | 78% |
| Fingerprint Sets | 55% |
| Plastic Baggies | 69% |
| Creating Their Own Badge | 62% |
Conclusion: Becoming a Crafty Spy
In our journey through the world of paper craft espionage, you’ve learned a lot. You turned ordinary items into cool spy gadgets. You also sharpened your creativity and problem-solving skills. This role offers fun and teaches skills useful in life and missions.
The key to mastering spy crafts is to keep learning and trying new things. Projects like improving your fingerprint set or making a spy kit challenge you to be creative. Your adventure continues with more inventions and enhancements for your gear. The spy tools world always has something new for you to explore.
Your mix of creativity and resourcefulness will be your secret power. It’s about having fun while mastering clever ways to solve mysteries. So, keep your kit ready, stay inquisitive, and enjoy playing the crafty spy!