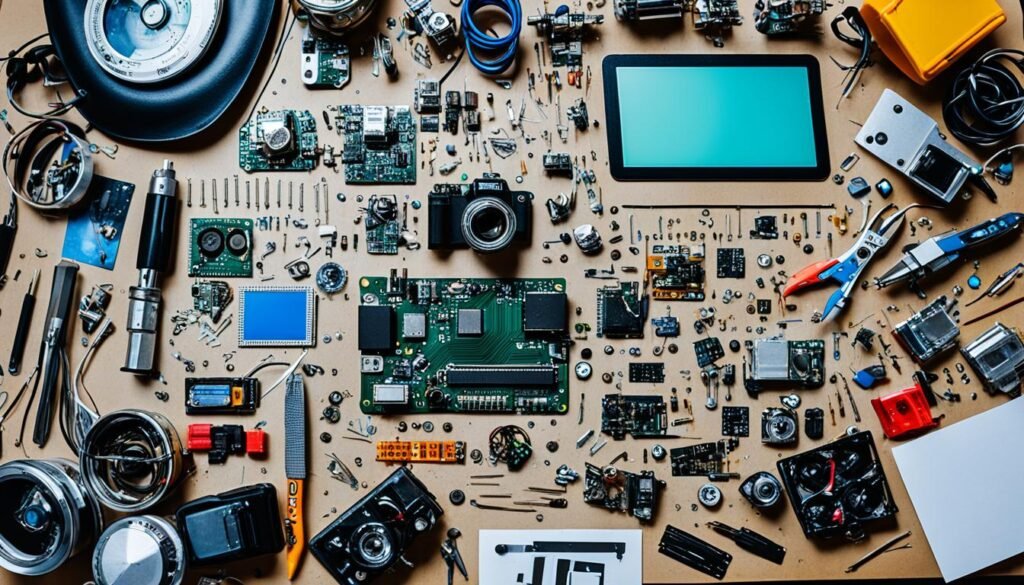
Have you ever wanted to make secret spy gadgets from things you already have? This guide will show you how. You’ll learn to turn everyday stuff into cool spy tools. For example, you can make a teddy bear with a camera inside or try a DIY fingerprint kit. These projects are fun, and they help kids learn how to make things.
This guide has easy projects for kids, like the Spy Teddy and DIY Fingerprint Set. You can use things around the house, like old toys or webcams. Step-by-step, you’ll turn them into neat spying gadgets. Kids can also build a Spy Periscope or make Invisible Ink. It’s all about using your imagination and thinking outside the box.
Introduction to DIY Spy Gadgets
Welcome to the exciting world of spying with easy-to-make gadgets! These spy devices are fun yet useful, good for anyone who loves a little bit of mystery. They will inspire the detective in you.
Spy gadgets have come a long way from simple tools to high-tech wonders. Thanks to tiny size and satellite tech, we can make awesome gadgets at home. This change has brought powerful tools to everyone.
Most homemade spy gadgets use things you have at home. For example, you can create a periscope from a cardboard box, mirrors, duct tape, and a knife. Over half of what you need is probably already in your house. Just be careful with things like mirrors to avoid accidents. Putting tape on their edges is a good safety tip.
Making these gadgets is a bit like solving a puzzle. You need to be precise when cutting and fitting parts together. This helps you learn how to think creatively and solve problems, which is really cool.
Building your own spy tools is not only fun but also very rewarding. It teaches you about spying’s past and future. You’ll find these gadgets useful in many ways, like for safety or just as a hobby.
So, get ready to turn ordinary items into gadgets that will impress your friends. Have fun exploring the DIY spy world!
Homemade Spy Gear for Beginners
Entering the world of spy gadgery is both fun and educational. There are many affordable spy gadget tutorials and easy DIY spy gadgets for beginners out there. They let you start your adventure with very little spending. Let’s explore what’s essential and how to get started.
Affordable Materials
First, gather materials that are easy to find and don’t cost much. Take the Spy Cam Coffee Cup, for instance. It needs items like paper coffee cups, Arduino, and a TTL serial camera. All these items are cheap and easy to get, perfect for newbies.
Basic Tools Needed
Owning a few key tools is crucial for building spy gadgets successfully. Among these are scissors, adhesive tape, soldering iron, and a mini screwdriver set. With these tools, you can make anything from a simple Bug Device to a Teddy Bear Spy Camera.
Start with Simple Projects
To boost your confidence, start with easy projects. They provide clear and achievable goals. For example, you can make Homemade Fingerprint Powder with stuff like starch powder, a knife, and a candle. This project is a great way to start. The Keyhole Spy Tool and Minion Notebook Spy Cam are also simple. They are perfect for people who are new to this craft.
| Project Name | Materials Required | Instructions Highlight |
|---|---|---|
| Spy Cam Coffee Cup | Paper coffee cups, Arduino, TTL serial camera, accelerometer | Focus camera lens, connect battery, test gadget |
| Bug Device | Cellphone, plug-in headset | Enable auto-answer, hide cellphone, start eavesdropping |
| Teddy Bear Spy Cam | Teddy bear, webcam, laptop, scissors | Mount webcam inside teddy bear, connect to computer |
| Homemade Fingerprint Powder | Starch powder, knife, candle | Mix soot and starch, reveal fingerprints |
| Keyhole Spy Tool | Thick black paper, small glass marble, scissors, sticky tape | Create tool for keyhole peeking |
| Minion Notebook Spy Cam | Image of a Minion, thick notebook, cutter blade, cellphone | Create notebook cover with hidden spy cam |
Start your journey with these affordable spy gadget tutorials and easy DIY spy gadgets for beginners. You’ll have lots of fun and learn a ton about spy gear right at home.
Creating a Spy Teddy Bear
Turning a teddy bear into a cool spying gadget is simpler than you’d imagine. First, pick a bear – a medium-sized one from a store like Walmart fits the bill. Don’t spend more than $50 on everything you need.
Then, find a small webcam that fits well. Make sure it works with your computer. Yet, Linux users might find this tricky. Check the webcam’s video quality to see if it needs any tweaks.
To start, make a small hole in the bear’s eye. Aim for a 5 or 6mm (1/4″) size for the camera lens. You may have to take out some stuffing to make space for the webcam.
Once you have the right spot and fit for the camera, secure it carefully with hot melt glue. This glue works best for glueing electronics into soft things. Put the camera in a good hiding spot, like the eye, leg, or belly.
- Choose a suitable medium-sized teddy bear
- Remove some stuffing to fit the camera
- Drill a hole in the eye, 5-6mm in diameter
- Place and secure the camera using hot melt glue
- Test the spy teddy bear for functionality before mailing
- Use a sturdy box for shipping, securing the delicate construction
In the USA, nanny cams dressed as teddies are becoming popular for home surveillance. Pick a camera with good video, battery, and internet connection features. Remember to follow laws on privacy to avoid any legal issues.
Here are some webcam models you can consider for your do it yourself surveillance tools project:
| Camera Model | Resolution | Battery Life | Connectivity Options |
|---|---|---|---|
| Cam A | 1080p | 4 hours | Wi-Fi, Bluetooth |
| Cam B | 720p | 6 hours | Wi-Fi |
| Cam C | 1080p | 8 hours | Bluetooth, SD Card |
Always, test your spy teddy bear once you’ve put it together. Make sure it records well and stays hidden. By following these steps, your bear will be a top-grade spying tool and a fun toy, too.
DIY Fingerprint Kit
Creating a DIY Fingerprint Kit is a fun way to learn about forensic science. You can make your own spy tools from easy to find items. This allows you to get involved in projects that teach you how to investigate like a pro.
Necessary Materials
- Fingerprint powder (charcoal or cocoa powder)
- Clear tape
- Index cards or white paper
- Brush or cotton swabs
- Magnifying glass
Step-by-Step Guide
- Start by getting some fingerprint powder. Charcoal or cocoa powder works well.
- Lightly dust the powder on a surface using a brush or cotton swabs.
- Carefully press clear tape on the powder fingerprint, then peel it off to lift the print.
- Stick the tape with the print on an index card or paper. This makes it easier to see the print.
Using the Fingerprint Kit
With your DIY kit, investigate fingerprints on different surfaces. You’ll learn how to spot unique patterns in prints. It’s a cool project for kids to play as detectives and learn about solving mysteries.
The kit is not just for learning. It’s also for fun play. Add a magnifying glass for a closer look at fingerprints. Kids can keep a detective log, writing down their findings and observations.
| Tool | Purpose |
|---|---|
| Fingerprint powder | Reveal and define fingerprints |
| Clear tape | Lift fingerprints from surfaces |
| Index cards | Store lifted fingerprint samples |
| Brushes or cotton swabs | Apply powder to a surface |
| Magnifying glass | Detailed observation of prints |
How to Make a Book Safe
Making a book safe is a cool way to hide stuff. It turns a book into a secret spot that’s fun and useful. Follow this easy guide to create your own book safe from things you have at home.
First, get thirty old records for just 25 cents each at a thrift store. They’re usually $1, but they’re discounted at 75% off. Vinyl LPs are big, with a 12-inch diameter. You’ll need to trim them to an 11 x 11 inches size with a template.
- Set up your cutting area and start trimming the records. It takes about twenty minutes to cut them all.
- To make the frame, use pine that’s 1×12 inches, with a thickness of 3/4 inches. Glue it well and let it dry under clamps for 30 minutes.
- Make the safe stronger by adding two to three album covers to the sides. This step adds both strength and realistic looks.
Place metal bookends inside the book safe to hold the records. Make the inside look like a real book using cardboard and fabric. You can also use stronger materials like fiberboard. Make sure it’s very stiff by using lots of hot glue.
Line the inside with felt so that your things don’t move around. Cut a piece of fabric a few inches bigger than needed. Stick it in with spray glue and tidy up the edges nicely.
- Use a strong thread or an elastic band to keep the book cover shut tight.
- Make sure the cover opens and closes well by adding a pivot point. This keeps you from gluing the cover shut.
This project is great for sharing on sites like Pinterest. Dickies supports it as part of their “Built to Work” action. It encourages making useful things at home, including cool espionage tools.
Simple DIY Spy Tech Projects
Making your own spy gadgets is exciting and teaches you a lot about spying. These projects are perfect for anyone, including kids and adults. You’ll use everyday items from around your home. They are simple to make and fun to use. Plus, they help spark your creativity and make you feel a bit like a spy.
Spy Periscope
Building a spy periscope is fun and teaches you about how we see things. You’ll need cardboard, mirrors, and some scissors.
- Get your materials ready: mirrors, cardboard, tape, and scissors.
- Cut two pieces of cardboard into rectangles.
- Place the mirrors inside the cardboard at 45-degree angles.
- Use tape to hold the mirrors in place.
- Put the cardboard pieces together to make a periscope.
With your new periscope, you can see around corners just like spies do!
Invisible Ink Kit
Making invisible ink is fun for secret messages. You’ll use lemon juice and paper for this craft.
- Grab your supplies: lemon juice, paper, a cotton swab, and a lamp or candle.
- Write your message with the cotton swab dipped in lemon juice.
- Let the paper dry.
- To see the message, gently warm the paper with a lamp or candle.
Watch as your secret message reveals itself with a little heat, just like real spies!
Secret Agent Costume
Making a secret agent costume lets kids play like they’re real spies. It’s a fun project for the whole family. You’ll need dark clothes, a hat, sunglasses, and a toy walkie-talkie.
- Get your spy outfit ready: dark clothes, a hat, sunglasses, and a toy walkie-talkie.
- Add a fake ID card or a small notebook for extra spy fun.
- Put on your outfit and practice being sneaky or using secret codes.
This outfit makes playing spy more fun and lets kids use their imaginations. It’s a great way to spend time together.
These projects are a great way to start exploring the world of homemade spy gear. With just a little creativity and stuff from home, you can make cool spy tools. They’re great for learning and adventure, too.
Building Your Own Spy Kit in a Box
Creating a cool spy kit is perfect for a new detective. First, pick a handy box to hold all your spying gear well. This project is both fun and teaches you, mixing ideas from simple DIY tools and fast builds.
| Item | Components |
|---|---|
| Spy Sunglasses | Mirrored sheet strips |
| DIY Fingerprint Set | Flour or baby powder, clear tape, black paper squares, magnifying glass, and a small container |
| Invisible Ink Kit | Lemon juice, cotton buds, small container, plastic bag, notepad, and heat source |
| Flashlight | Standard or mini flashlight |
| Moustache | Fake moustache, glue, or adhesive tape |
| Notebook | 4″ x 6″ notebook sheets |
| Binoculars | Standard or mini binoculars |
| Spy ID Card | DIY Spy ID template, thin cardboard, photo, scissors, glue, ruler, tape, and pen |
Your spy kit will be ready for all kinds of sneaky jobs by including these tools. With the Spy ID card, invisible ink kit, and DIY fingerprint set, you are set for secret missions. It’s full of easy-to-make spy gadgets and quick builds, ready for your unique touch.
Creative Espionage Devices for Kids
Getting kids into spy work can be fun and teach them a lot. We’ve found 10 cool spy devices they can make themselves. Many of them use stuff you already have at home, like cardboard and paper. They can also make invisible ink or fingerprint kits. About 20% of the projects are about making disguise kits, which are great for pretending to be a spy. For kids who like building, there are projects like a book safe and a spy periscope. It’s amazing because most of these things don’t cost much. And they show kids that being a spy doesn’t have to be expensive.
Making a Spy ID Card is a fun start for kids who want to be spies. They just need some cardstock, markers, and a laminator. With these, they can make a custom ID card that looks real. Another exciting project lets kids make a Keyhole Spy Gadget. This needs only a small mirror and cardboard. It’s a cool tool for looking through keyholes without being seen. It makes spying on secrets more fun.
For kids who like puzzles, a Spy Decoder is perfect. They use a cardboard circle and a brass fastener to make a secret code wheel. This device lets them send and receive hidden messages. It teaches them about codes and is a lot of fun. These spy projects help kids be creative and think smart. They offer lots of fun and learning.
Spy ID Card
Kids can easily make a cool Spy ID Card. They use cardstock, markers, and a laminator for this fun project. Adding their photo, name, and a made-up spy title makes it feel real.
Keyhole Spy Gadget
The Keyhole Spy Gadget is unique and fun. It needs a small mirror and cardboard. Kids can use it to spy safely through keyholes. It’s perfect for building observation skills in a fun way.
Spy Decoder
Building a Spy Decoder is a neat activity. Kids can use a cardboard circle and a brass fastener to make a secret code wheel. This helps them learn about codes while imagining spy missions.