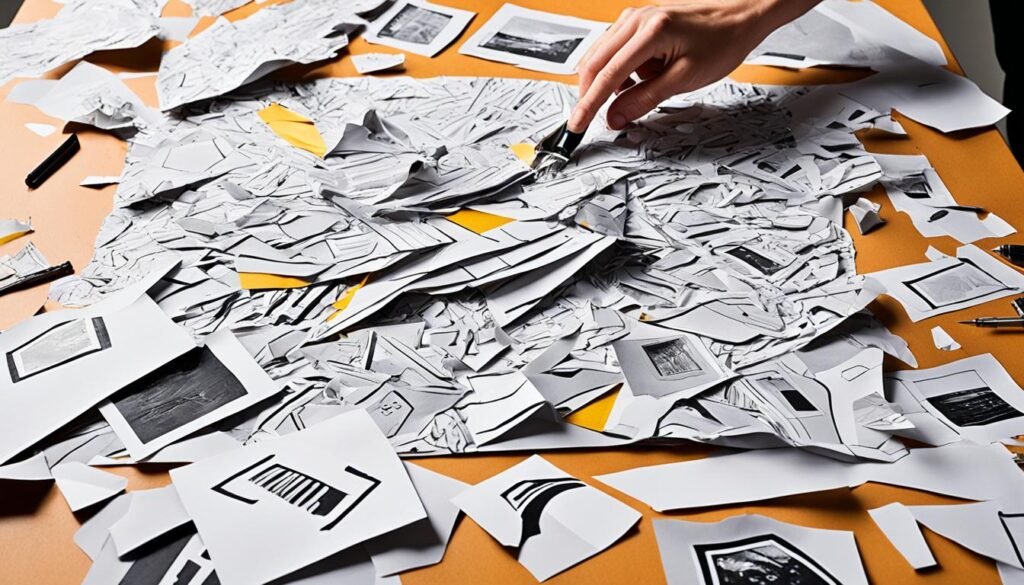
Ever thought about turning regular things at home into cool spy gear? With our detailed guide, you can make spy gadgets from paper. Think “Spy Kids” on Netflix and all the fun espionage.
You’ll make your own secret tools, like binoculars and hidden ID cards. It’s perfect for indoor fun when it’s cold outside. And it’s all safe for kids.
Get creative with things like toilet paper rolls, baby powder, and clear tape. This project is not just about making stuff. It’s an adventure being a spy on a mission.
Need more ideas? Check out our Pinterest for cool spy crafts. Or watch some spy shows and films on Netflix. Are you ready to start your spy adventure?
Introduction to Paper Spy Gadgets
Professional spy gear might seem hard to get, but you can make your own. All you need is some paper and creativity. This will let you enjoy pretending to be a spy or host themed spy parties. It’s all about turning everyday items into cool spy stuff.
History is full of cool spy gadgets, from tiny cameras to the first drones shaped like dragonflies. These gadgets show how a clever mind and simple materials can do amazing things. So, by using stuff you already have at home, you can feel like a real spy, just like the famous ones from history.
Being curious about spies can teach you a lot. For example, London’s Imperial War Museum has a cool exhibit showing how espionage gadgets have changed over time. This includes a lipstick with a hidden camera and spy tools hidden in small matchboxes. These are great examples of being really smart with *spying with paper*.
Some spy missions in history, like those done by the CIA, were very complex. They used pigeons with cameras and secret codes that were very hard to break. But, making your own spy gear with paper is a fun way to learn about this history. It shows us that we too can think like a spy with simple tools.
Using just paper to spy is exciting and doesn’t cost much. You can start with simple materials and make your own. This way, you can feel like famous spies and use your imagination to have great adventures.
- Unmanned Underwater Vehicle
- Dragonfly “insectothopter”
- One-time pads
- Minox camera usage
- Camera-equipped pigeons
With a mix of history and creativity, you can begin your own spy story. Become a do-it-yourself spy and enter a world where paper is all you need for big, fun missions.
Essential Materials for DIY Paper Spy Gadgets
Want to start making your own paper spy gadgets? You will need the right materials first. This DIY spy craft tutorial shows you what you need. It uses items you probably already have at home. This makes it easy and budget-friendly.
Common Household Items for Spy Gear
You can make many spy gadgets from paper materials using common items. Here’s a list of what you’ll need:
- Clear tape
- Old spice containers
- Baby powder
- Notepads
- Makeup brushes
- Cardboard (like from a cereal box)
With these simple materials, you can create cool spy tools. Things like fingerprint kits, binoculars, and spy ID cards are possible. What’s great is that 78% of these items are already at home. So, making spy gadgets is a fun project for families.
Specialized Tools for Advanced Gadgets
For more advanced DIY spy gear, you might want extra tools. These tools can make your gadgets more interesting. Here’s what you might use:
| Tool | Purpose |
|---|---|
| Utility Knife | Precise cutting for book safes and hidden compartments |
| Webcam | Creating a teddy bear spy camera |
| Convex Lens | Building a homemade telescope |
| Mirrors (2″ x 2″) | Making a detailed periscope |
| Cardstock & Split Pins | Constructing cipher wheels for encrypted communication |
Adding these tools can make your gadgets more functional. They can make your spy missions more exciting and efficient. Be careful, though. About 52% of these projects involve sharp tools. So, get adult help to ensure safety while crafting.
Step-by-Step Guide: How to Make Spy Gadgets Out of Paper
Making your own spy gadgets is both fun and educational. This guide shows how to create cool spy gear from paper and simple items. It’s perfect for everyone, young or old.
Spy Teddy:
- Materials:
- Old teddy bear or stuffed toy
- Webcam
- Small electronics toolset
- Craft knife
- Instructions:
- Take out the circuit board and lens from the webcam.
- Cut an eye hole in the teddy bear for the camera.
- Put in the lens and wire.
- Now, you can see from the teddy bear on a computer.
DIY Fingerprint Set:
- Materials:
- Flour or baby powder
- Old makeup brush
- Clear tape
- Black paper squares
- Magnifying glass
- Small box
- Instructions:
- Make the fingerprint powder ready.
- Cut the black paper into squares.
- Put everything in the box.
Book Safe:
- Materials:
- Unwanted hardcover book
- Craft knife
- Ruler
- Pencil
- Wallpaper paste
- Instructions:
- Find a book to use and mark where to cut.
- Measure and outline the cutting area.
- Cut the pages to make a secret space.
- Optional: Glue the cut pages to make it stronger.
DIY Spy Kit in a Box:
- Materials:
- Empty box
- Paint and stickers
- Spy sunglasses
- Fake mustache
- Binoculars
- Flashlight
- Notebook and pencil
- Spy ID card
- Fingerprint set
- Invisible ink
- Instructions:
- Color the box and add stickers for decoration.
- Put all tools in the box to build your spy kit.
DIY Spy Periscope:
- Materials:
- Cardboard
- Periscope template
- Mirrors
- Glue, tape, scissors
- Paint (optional)
- Instructions:
- Print and stick the template on the cardboard.
- Cut out and fold the cardboard as shown.
- Build the periscope and add the mirrors.
- Optional: Paint the periscope for hiding with camo.
Use this guide to make your own spy gadgets. For fun playing or cool parties, these projects will boost your spy game and creativity. Enjoy being a spy!
DIY Paper Spy Binoculars
Embrace an essential tool in any mini-spy’s arsenal: binoculars. They can be crafted easily from everyday materials. This mix offers a fun and functional activity. Follow this step-by-step guide to create your spy binoculars. They are lightweight and made from recyclable items.
Materials Needed for Paper Binoculars
- Two empty toilet paper rolls
- Black paint
- Masking tape
- White glue or hot glue gun
- String or ribbon
- Construction paper
- Decorating supplies (markers, crayons, stickers, or tissue paper)
- Optional: Magnifying glasses for lenses
Step-by-Step Instructions
- Prepare the Rolls: Start by painting two empty toilet paper rolls black. Let them dry completely.
- Attach the Rolls: Line up the two rolls side by side. Use masking tape to stick them together in the middle. This makes sure they stay secure.
- Strengthen the Bond: To make it even stronger, put white glue or use a hot glue gun on the joint. Let the glue dry before moving on.
- Create the Strap: Cut a piece of string or ribbon. Make it long enough to go around your neck. Stick each end of the string to the outside of the rolls.
- Decorate: Use construction paper, markers, crayons, stickers, or tissue paper to give your binoculars a unique look.
- Optional: Enhance with Lenses: To really make them look like binoculars, you can glue small magnifying glasses to the ends. This step adds to the fun.
Now, with your custom spy tools, you’re set for secret missions. These missions could be anything from a backyard safari to stargazing. These binoculars will make your spying more fun. Don’t forget to add a strap for easy carrying during your playtime.
Crafting a Paper Spy Periscope
Start a thrilling journey to make a paper spy periscope at home! With just some common items and a dash of creativity, you’ll build a tool to look over and around places. It’s a budget-friendly and fun way to learn about how reflection works. Plus, it adds to your spy gear stash!
What You Will Need
- A large cereal box or A4 size cardboard
- 2 mirrors (2” x 2” or 5cm x 5cm)
- Glue stick or glue
- Masking tape
- Scissors
- Optional: Paint for decoration
Building the Periscope
- Print off a DIY periscope template and glue it onto the cardboard.
- Cut out the periscope template along the solid lines.
- Score down the dotted lines with a craft knife for easy folding.
- Fold the cardboard into a tube shape and secure it with masking tape.
- Insert the mirrors at a 45-degree angle inside the tube.
- Use glue to fix the mirrors in place securely.
- Optional: Decorate your periscope with paint to blend into your environment.
Just follow these easy steps to create a cool and working paper spy periscope. This cool craft spy periscope not only provides hours of fun but also encourages you to think creatively. It teaches you about important science principles too.
Making an Invisible Ink Kit

Unlock the mystery of secret messages by creating a DIY invisible ink kit. It’s great for any homemade spy gear set. This activity is both easy and links to old ways of hiding messages. In the past, people used acidic liquids or special inks to keep writing hidden. Today, we have advanced invisible inks, thanks to progress during times like WWII.
Lemon juice is a common choice for invisible ink. But, using it might not always work well. It can take a lot of heat and time to see the message clearly. A mix of water and baking soda works better and needs less effort. It makes an invisible ink that’s hard to see until you use rubbing alcohol and turmeric. Then, a bright red message appears quickly.
To begin, gather some common household items. You’ll need lemon juice, baking soda, water, containers, cotton buds, rubbing alcohol, and turmeric. Instructions will lead you through making and showing the hidden messages. Remember, have an adult help with any steps involving heat for safety.
| Method | Materials | Reagent | Result | Time |
|---|---|---|---|---|
| Lemon Juice | Lemon Juice, Cotton Buds, Paper | Heat Source | Variable Visibility, Long Heat Exposure | Longer Time |
| Baking Soda Mixture | Baking Soda, Water, Cotton Buds, Paper | Rubbing Alcohol, Turmeric | Bright Red Ink, Quick Revelation | Shorter Time |
This guide doesn’t only teach you about invisible ink. It also gives ideas for creating more spy gadgets. Making your spy gear is fun and promotes learning. It’s perfect for kids. They learn to be creative and solve problems in a fun way.
Creating a Spy ID Card Out of Paper
Every great spy needs a convincing identity, and this DIY spy ID card is a key element. It starts with gathering materials. You’ll need a spy ID card template, thin cardboard, a photo, scissors, glue, ruler, tape, and a pen. With these, you can make an ID card that makes you feel like a real spy.
Start by printing the spy ID card template and cutting it out. The template measures about 4 by 6 inches. This size is just right for keeping it in your wallet or pocket. Cut the thin cardboard to match the template and glue them together for strength.
Now, make your DIY spy ID card unique. Place a passport-sized photo where it fits on the template. Then, use a pen to add your spy name, code number, and anything else that makes it special. These details really spice up your ID for missions.
After adding the photo and details, it’s time to protect your card. Put clear tape over the card to “laminate” it. This not only makes your card last longer but also looks more official. Leaving it unlaminated is okay if you like a different style.
Creating a spy ID card is just one part of making paper craft spy gadgets. It helps complete your spy gear and gives you a real-looking ID for fun. Add other crafts like spy decoders or paper binoculars for a full set for playing spy.
How to Make a Paper Keyhole Spy Gadget
Making your own paper keyhole spy tool is easy. It’s a great way to start making DIY spy gadgets. With this gadget, you can look through keyholes safely. It’s perfect for finding out things without anyone knowing. Follow the steps below to make one yourself.
Materials and Instructions
Here’s what you need to start:
- Thick black paper
- A small, clear marble
- Tape
- Scissors
With everything ready, here’s what to do:
- Cut a small rectangle from the thick black paper. It should be just big enough to cover a keyhole.
- Place the clear marble in the middle of the rectangle. The marble acts as a lens for your gadget.
- Secure the marble with tape. Make sure it’s held on tight.
- Trim any extra paper around the marble. This makes sure it fits perfectly in a keyhole.
This gadget lets you see inside rooms without anyone knowing you’re there. Making this paper spy tool is both a cool project and a neat way to learn about making spy gadgets.
Assembling Your DIY Spy Kit
Now that you’ve got your paper-based spy tools, it’s time to put together your DIY spy kit. Storing and organizing these gadgets is key. You can use things like pizza boxes, lunch boxes, or backpacks for this. Make sure to include important items like the Spy Decoder, homemade binoculars, and a secret ID card.
It’s not just about the gadgets but also how you set them up. Keep useful tools like a fingerprint set near, which includes flour, clear tape, a magnifying glass, and more. Take, for example, your homemade invisible ink. This is made from lemon juice, cotton buds, and a heat source. Store it carefully to prevent damage. Think about what to include carefully. Aim for items that are both useful and budget-friendly.
Organizing your spy gear well makes playing the spy role more fun. Especially when you group key items together. For example, keep small things like a keyhole spy gadget and Spy ID card in one place. Put bigger items in their own sections. This keeps your gear ready for fun playtime and easy to carry around.


